
はじめに
趣味でExpo + ReactNativeアプリを開発していく中でログイン認証画面を実装しよう。となったので記録を残します。
経緯:Cloud Firestoreのセキュリティルール設定を行う中で認証機能があったほうが設定がしやすかった。
Expoアプリもあるかつ、Firebaseにアカウント/プロジェクトを作成してある前提で話を進めます。
Firebaseの設定
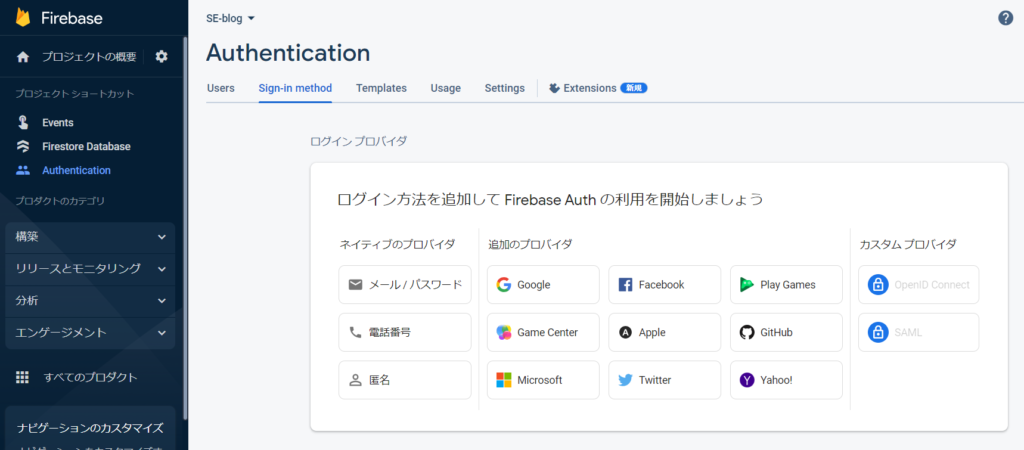
プロジェクトを作成するとプロジェクト概要画面が表示されるのでAuthentication[ユーザ認証と管理]をクリックします。

Authentication[ユーザ認証と管理] > 始める を押下するとログイン プロバイダ画面が出てくると思います。
筆者は簡易的なログイン画面を実装すればよかったのでメール/パスワードを選択しました。
メール/パスワードを選択すると以下のような画面になると思います。
メール/パスワードを有効にするに変更にして保存ボタンをクリックしてください。
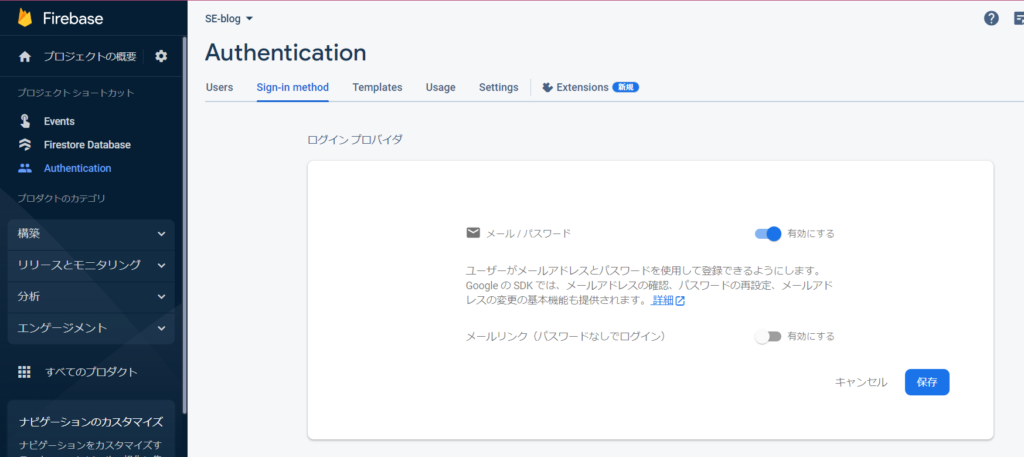
認証の設定は完了です。
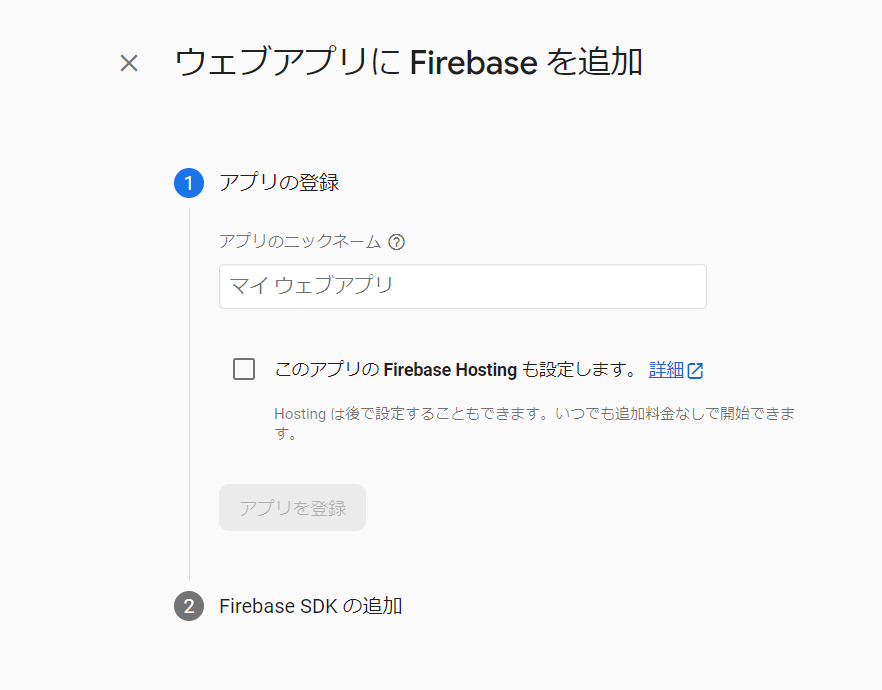
次にコンソール画面に戻って画面中央にある</>ボタンをクリックし、アプリを利用するためのコードを取得します。
次にウェブアプリの登録を行います。任意の名前のアプリの名前を入力してアプリを登録ボタンをクリックしてください。
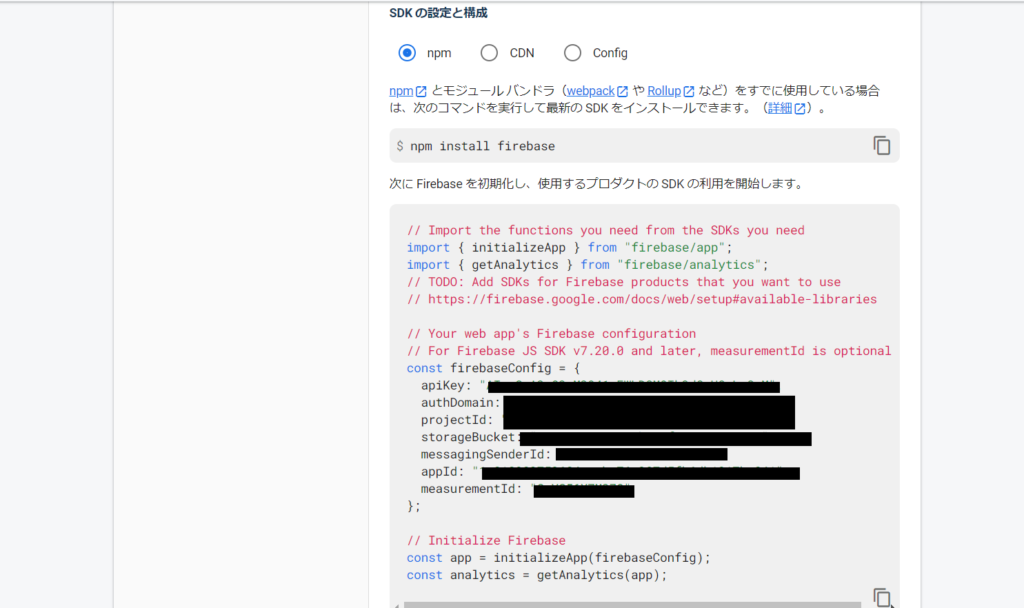
筆者は既に作成してしまっているので若干画面の内容が違いますが、apiKeyなどの情報が表示されている画面が表示されたと思います。
情報は登録したアプリ固有の情報です。Firebase に接続するために必要となる情報が表示されているので大切に保管してください。後ほどこれらの情報を React Native から Firebase への接続に利用します。
Expoアプリの設定
※アプリは既に作成してある前提で話を進めます。
インストール
expo install firebasefirebaseに接続を行うための準備を行います。
あとはページ遷移を行うのでnavigationと関連ライブラリも入れます。既にあれば問題ないです。
npm install @react-navigation/nativeexpo install react-native-screens react-native-safe-area-contextnpm install @react-navigation/native-stack実装
Firebaseの設定の最後でapiKeyを取得したかと思います。それを任意のファイルに設定します。
筆者はDB操作するファイルに一旦おきました。(設定ファイルに書き出すのが理想です。)
import { initializeApp, applicationDefault, cert } from 'firebase/app';
import { getAuth } from 'firebase/auth';
import { getFirestore, collection, getDocs, setDoc, doc, getDoc, updateDoc } from 'firebase/firestore';

// Initialize Firebase
const firebaseConfig = {
  apiKey: "XXX",
  authDomain: "XXX",
  projectId: "XXX",
  storageBucket: "XXX",
  messagingSenderId: "XXX",
  appId: "XXX",
  measurementId: "XXX"
}

const app = initializeApp(firebaseConfig);

export const auth = getAuth(app);

export const insertRecipes = async props => {
  const { collectionName, document, data } = props;

  try {
    const db = getFirestore(app);

    const ref = doc(db, collectionName, document);
    await setDoc(ref, data, { merge: false } );

  } catch(error) {
    console.log('setCollection', {error})

  }
};

export const getData = async props => {
  const { collectionName, document } = props;

  try {
    const db = getFirestore(app);

    const docRef = doc(db, collectionName, document);
    const docSnap = await getDoc(docRef);

    if (docSnap.exists()) {
      console.log("Document data:", docSnap.data());
      return docSnap.data()
    }
    return null

  } catch(error) {
    console.log('setCollection', {error})
    return null
  }
};
画面の作成
最低でも3画面必要なので、HomeScreen.js, AccountScreen.js, LoginScreen.js ファイルを作成していきます。
HomeScreen は認証が完了しているユーザのみ表示されます。
AccountScreenと LoginScreen は認証が完了していないユーザの場合に表示される画面です。
Home画面
import React from 'react';
import { View, Text } from 'react-native';

const HomeScreen = () => {
  return (
    <View>
      <Text>ホーム画面</Text>
    </View>
  );
};

export default HomeScreen;
アカウント作成画面
import React, { useState } from 'react';
import {
  View,
  TextInput,
  Text,
  TouchableOpacity,
  KeyboardAvoidingView,
} from 'react-native';
import { createUserWithEmailAndPassword } from 'firebase/auth';
import { auth } from '../api';

const AccountScreen = () => {


  const [email, setEmail] = useState('');
  const [password, setPassword] = useState('');

  const handleRegister = async () => {
    try {
      const user = await createUserWithEmailAndPassword(auth, email, password);
      console.log(user);
    } catch (error) {
      console.log(error.message);
    }
  };

  return (
    <KeyboardAvoidingView
      behavior="padding"
      style={{
        justifyContent: 'center',
        alignItems: 'center',
        flex: 1,
      }}
    >
      <Text style={{ fontSize: 20, marginBottom: 20 }}>ユーザ登録画面</Text>
      <View style={{ marginBottom: 20 }}>
        <TextInput
          style={{
            width: 250,
            borderWidth: 1,
            padding: 5,
            borderColor: 'gray',
          }}
          onChangeText={setEmail}
          value={email}
          placeholder="メールアドレスを入力してください"
          autoCapitalize="none"
          autoCorrect={false}
        />
      </View>
      <View style={{ marginBottom: 20 }}>
        <TextInput
          style={{
            width: 250,
            borderWidth: 1,
            padding: 5,
            borderColor: 'gray',
          }}
          onChangeText={setPassword}
          value={password}
          placeholder="パスワードを入力してください"
          secureTextEntry={true}
          autoCapitalize="none"
        />
      </View>
      <TouchableOpacity
        style={{
          padding: 10,
          backgroundColor: '#88cb7f',
          borderRadius: 10,
        }}
        onPress={handleRegister}
        // disabled={!email || !password}
      >
        <Text style={{ color: 'white' }}>登録する</Text>
      </TouchableOpacity>
    </KeyboardAvoidingView>
  );
};

export default AccountScreen;
ログイン画面
import React, { useState } from 'react';
import { signInWithEmailAndPassword } from 'firebase/auth';
import {
  View,
  TextInput,
  Text,
  TouchableOpacity,
  KeyboardAvoidingView,
} from 'react-native';
import { auth } from '../api';

const LoginScreen = props => {
  const { navigation } = props
  const [email, setEmail] = useState('');
  const [password, setPassword] = useState('');

  const handleLogin = async () => {
    try {
      await signInWithEmailAndPassword(auth, email, password);
    } catch (error) {
      console.log(error.message);
    }
  };

  return (
    <KeyboardAvoidingView
      behavior="padding"
      style={{
        justifyContent: 'center',
        alignItems: 'center',
        flex: 1,
      }}
    >
      <Text style={{ fontSize: 20, marginBottom: 20 }}>ログイン画面</Text>
      <View style={{ marginBottom: 20 }}>
        <TextInput
          style={{
            width: 250,
            borderWidth: 1,
            padding: 5,
            borderColor: 'gray',
          }}
          onChangeText={setEmail}
          value={email}
          placeholder="メールアドレスを入力してください"
          autoCapitalize="none"
          autoCorrect={false}
        />
      </View>
      <View style={{ marginBottom: 20 }}>
        <TextInput
          style={{
            width: 250,
            borderWidth: 1,
            padding: 5,
            borderColor: 'gray',
          }}
          onChangeText={setPassword}
          value={password}
          placeholder="パスワードを入力してください"
          secureTextEntry={true}
          autoCapitalize="none"
        />
      </View>
      <TouchableOpacity
        style={{
          padding: 10,
          backgroundColor: '#88cb7f',
          borderRadius: 10,
        }}
        onPress={handleLogin}
        // disabled={!email || !password}
      >
        <Text style={{ color: 'white' }}>ログイン</Text>
      </TouchableOpacity>
      <TouchableOpacity
        style={{ marginTop: 10 }}
        onPress={() => navigation.navigate('Account')}
      >
        <Text>ユーザ登録はこちら</Text>
      </TouchableOpacity>
    </KeyboardAvoidingView>
  );
};

export default LoginScreen;
ユーザのログイン状態の監視
firebase ではユーザのログイン、ログアウトを onAuthStateChanged を利用して監視することで firebase にログインしているユーザの情報を取得することができます。
App.js の useEffect Hook の中で onAuthStateChanged で監視を開始します。onAuthStateChanged を実行すると監視を解除するための関数 unsubscribe が戻されるので useEffect のクリーンアップで onAuthStateChanged の解除を行っています。
import { useEffect, useState } from 'react';
import { onAuthStateChanged } from 'firebase/auth';

import { SafeAreaView, StatusBar } from 'react-native';
import TabNavigator from './src/navigations/TabNavigator';
import { Colors } from './src/common/Colors';
import { auth } from './src/api';
import LoginScreen from './src/screens/LoginScreen';

export default function App() {

  const [user, setUser] = useState('');
  const [loading, setLoading] = useState(true);

  useEffect(() => {
    const unsubscribe = onAuthStateChanged(auth, (user) => {
      setLoading(false);
      if (user) {
        console.log(user);
        setUser(user);
      } else {
        setUser('');
      }
    });
    return () => unsubscribe();
  }, []);

  if (loading) {
    return (
      <View
        style={{
          justifyContent: 'center',
          alignItems: 'center',
          flex: 1,
        }}
      >
        <Text>Loading...</Text>
      </View>
    );
  } else {
    return (
        <SafeAreaView style={{flex: 1, backgroundColor: Colors.HeaderFooterColor}}>
          <StatusBar barStyle="light-content" />
          {user ? (
            <TabNavigator />
          ) : (

            <LoginScreen />
          )}
        </SafeAreaView>
    )
  }
}
ログアウト機能
最後に適当な場所にログアウトボタンを作成します。
筆者のアプリはまだ開発途中なので一旦HOME画面に作成してしまいました。
import { useEffect, useState } from 'react';
import { StyleSheet, Text, View, TouchableOpacity } from 'react-native';
import { signOut } from 'firebase/auth';
import { auth } from '../api';
import AppButton from '../components/AppButton';

const HomeScreen = () => {

  const handleLogout = () => {
    signOut(auth)
      .then(() => {
        console.log('logout');
      })
      .catch((error) => {
        console.log(error.message);
      });
  };

  return (
    <View style={styles.container}>
      <View style={styles.titleAreaStyle}>
        <Text style={[styles.titleStyle, globalStyles.fontWeight]}>{`HOME`}</Text>
      </View>
      <View style={styles.btnAreaStyle}>
        <View style={styles.btnBox}>
          <AppButton
            style={styles.btnStyle}
            textStyle={{ color: Colors.BtnTextColor }}
            text={'ログアウト'}
            onPress={handleLogout}
          />
        </View>
      </View>
    </View>
  );
}

export default HomeScreen;

コメント